How to Recover Photos and Videos with 7-Data Photo Recovery
This will be a four-step tutorial which shows how to restore photo, images, video, audio from your local drive and removable devices such as USB drive, memory card and mobile phone. Before recovery, please make sure you connected your removable devices to the PC on which you installed 7-Data Photo Recovery.
Step 1. Select the drive/device you want to recover photo from.
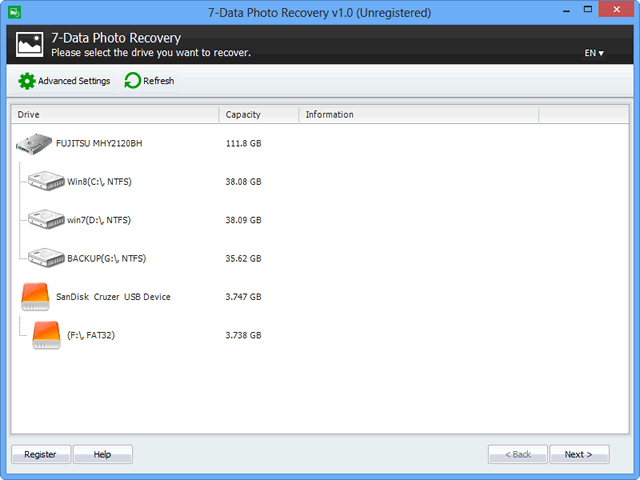 7-Data Photo Recovery will show all drives and removable device found on your computer. You can select a partition or the entire drive or the removable devices such as SD card and USB drives from which you need to recover photos/images/videos.
Step 2. Start scanning for recoverable photos.
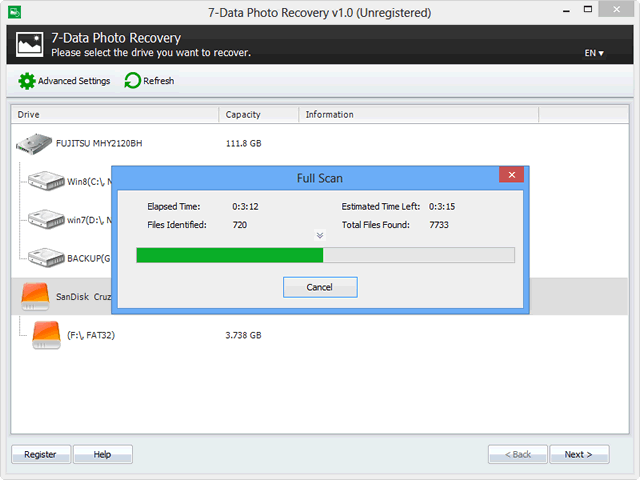 Please select the drive (local or removable) you want to restore photos/images from and click “Next” button to start a scan for recoverable photos or images. Before scan you can configure which types of image files and multimedia files you want to recover during the scan by clicking “Advanced Settings” button.
Step 3. Preview recovered photos.
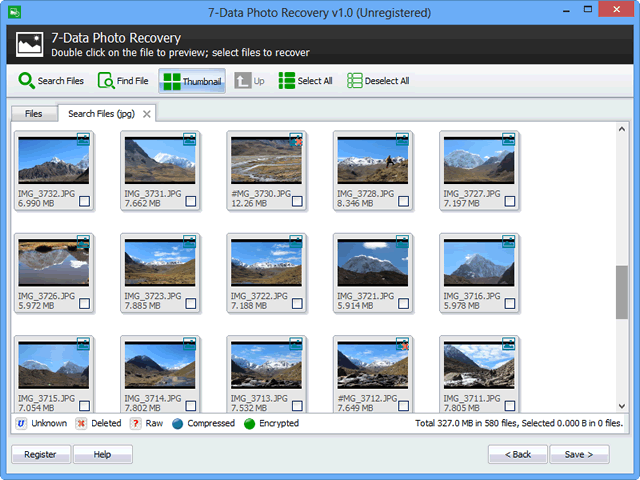 After scan is complete, you can browse and preview the photos listed in the original tree structure of the card/drive. You can click the “Thumbnails” to view the photo in thumbnails instead of list. You can double click the photo to preview it in another window. If you want to search for a specific photo, you can use the “Search” button.
Step 4. Save recovered photos.
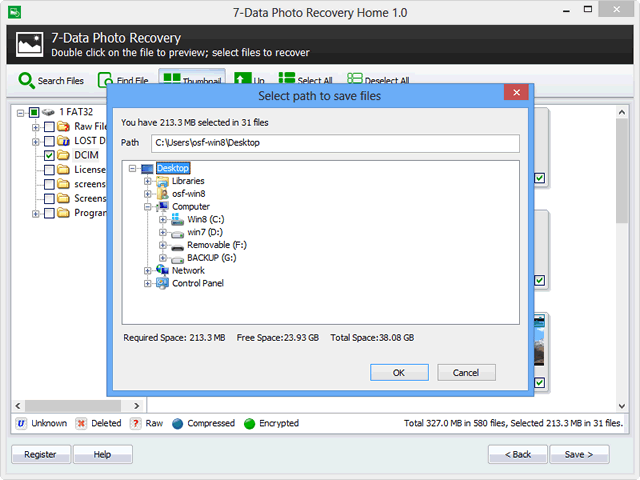 After you decide which photos you want to recover, please select them all and click the “Save” button. Choose the path you want to save these photos to and it’s done. Now you can see the recovered photos in the destination folder.